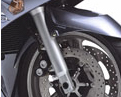
Many FJR owners might now be getting to minimum thickness on their rotors, coinciding with 4+ years of ownership. Many people will baulk at the price of both OEM and aftermarket rotors. Braking brand wave rotors were purchased for the front and a Galfer for the rear (because Braking do not make a rear for the FJR). The fronts were $560 a pair (cheap if compared to the OEM product) and $145 for the rear. These rotors are marginally thicker than OEM from new.I used EBC kevlar pads for all sets. Sintered double H brake pads really haul you up, but squeal like a Sydney taxi, lose 'em. Stainless lines, from Goodridge (John Stamnas in Brisbane), complete the project. I would call the installation easy, but this would be dependant on your level of comfort and capability. As you can see, two things about the rear rotor, there is definitely less sprung mass without the decorative faux carrier centre. Secondly, all the nooks-and-crannys are now exposed, ergo=more cleaning.... I must say, though, these are miles cheaper than the OEM product and come with free pads. I paid US$129 and $40 delivery. That totalled AUD$180, which is about $220 cheaper than the Yamaha purchased rotor. More bike images here.
Operation LED Lights
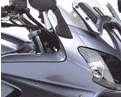
Has anyone lost a dash bulb yet??? The failure of a dash bulb can turn into a 4-hour fix. Whilst I had the nose cone off and all A,B,C,D panels removed, I installed my HID, LED replacements and fitted an LED flasher relay, which is essential if you are chosing to use LED as your indicators. I would recommend, if you are considering fitting HID lights, then also add an LED flasher and LED dash wedges and globes on to your shopping list. It can be a costly event, both in time and patience, if you have to reopen the front of your FJR. Choosing the right LED bulbs is extremely important, they come in both 1156 and 1157 styles (380 and 382 in the UK/Bay15D and Bay 15S in the US) and need to be the luxeon style 3watt or better to perform close to a 21watt single or 25/5watt dual filament incandescent. One thing about LED is their immediacy of operation, their low heat-low wattage properties which reduces taxable horsepower, ergo=heat and increases battery life. My battery is now turning 5 years old.
Operation Power Commander USB III
Most would say that little needs to be done to correct this bike. It is close to ideal for long day touring. I find that most 4-banger machines tend to be on the buzzy side and this bike can also be a tad snatchy on low down rpm. The Power Commander has smoothed out the jerky nature of moving from idle to higher rpm. Additionally, being able to re-map your machine for ultimate performance one day and then supreme fuel economy the next makes for a much more versatile bike. (Also, standing next to a few other bikers and connecting your laptop to your FJR and changing your mapping is really cool and a bit of a talking point!) I would like to thank H Marc Lewis and Warchild for their excellent sites; www.fjrtech.com and www.fjr1300.info for all the excellent how-to's.
Having installed one, which was an effortless 15 minute job, combined with a good choice of maps from the site and others from the forums, the responsiveness and feeling of roll-on power now is much smoother and spritely. I have noticed a small increase in fuel usage. I was using 6.16 litres per 100km before and now 6.46 litres per 100km. This may be something that can be worked upon but for the loss of 300ml I am not ever going to complain. I have not lifted my right hand to shake out numbness once since installing this.
Click HERE for downloadable Power Commander Maps *For 2001-2005 model FJR 1300 GEN I and GEN II*
Operation HID Headlights
HID is High Intensity Discharge. The standard H4 incandescent bulb illuminates by heating a wire within a halogen gas matrix. The bulb has two lighting centres, one 55watt low beam and another 60watt high. When you depress the passing or the Hi/Lo beam switch one or the other illuminates and is positioned to use the reflector to project the light. HID uses an arc of electricity within gas, not needing a filament of wire to produce the light. Also, it only uses 35watts per bulb to create both high and low. The bulbs I chose are moveable (it has a solenoid on the rear), they position themselves to project high or low. The system uses one of the headlight loom conectors to control the loom provided, which also means you will have to position another substantial loom, control box and two ballasts/igniter boxes within the nose of your bike, again this is a big job (approx. 3 hours). You will have a choice of Kelvin temperature output (4300K is close to normal halogen, 6000K is extremely white with a tiny hint of blue, higher tends to border on blue toward purple).
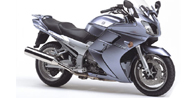
Since I live in Australia and having access to locally made STAINTUNE products, I chose not to venture into the unknown. They are simply the best looking polished stainless pipes, period. They keep with the original flavour but tighten up the rear end (and you don't look like the Starship Enterprise with giant nacelles coming off the sides!!)
Left is the Staintunes, right is original, not too different and very throaty.
There is a Product Comparo on exhaust slip-ons HERE.
Operation CycleGraphics
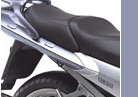
Some areas of the bike have wear marks through the paint, such as the side covers above the foot pegs. Instead of repainting those exclusively, I am going to dress up the bike with some graphics until the time is right to paint the entire bike. Ok, ok.. so, it's not going to be everyone's cup-o-tea, but to cover the wear marks and give it something unique... at least until I get weary of this look. They are easily repositioned with heat and do not stick permanently. Mine is the one in the middle... Let me know what you think...!
Coming Soon
Polished Wheels
Some have already done this, to great effect. I am thinking about having the outer drum polished and leaving the dark charcoal centres. This will alleviate all the tired small notches and gouges from tyre fitting laziness.
Ok.. so I stole/borrowed this picture from FJRForum.com, but this is the idea....
Coming Soon
Mesh in Vent Apperatures
A very inventive way to tidy the gaps in between the front fairing, using expanded metal mesh, similar to the radiator guards. I learnt this technique from a Hayabusa rider friend and it seems popular among that crowd. I intend positioning the metal with stick-on velcro to see what it looks like... if I decide to keep it, then it will be epoxy fixed. The metal does not necessarily have to be plain aluminium. This material can be powder coated, painted, anodised, chromed or electroplated (after striking with copper and nickel first)... the possibilities are almost endless...
Operation Hitch and Tow
This is some of the farkling of a member, Colin of Adelaide. He is on an epic journey of Oz, seems to me in a great hurry! His really good ride journal can be found HERE. Colin has sent a few images for us to ponder... Now towing might not be your cup of tea, yet, but when you're on the ground with ants attacking you at the rally, check out Colin's Taj Mahal !!!! With trailers you can buy cheap or heinously expensive, your choice!!